SQLScout
SQLScout is a plugin for Android Studio and IntelliJ IDEA that provides powerful, dedicated support for SQLite databases.
Overview

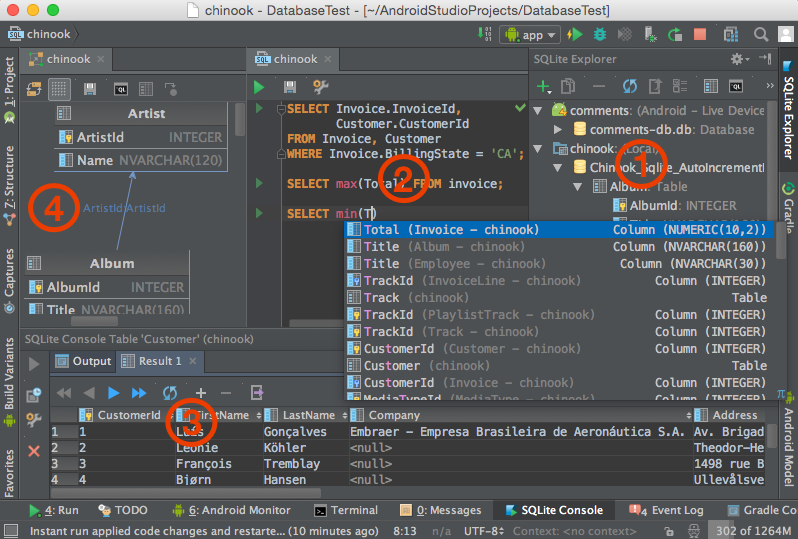
Figure 1. SQLScout's Components
- SQLite Explorer. Connect to SQLite databases in Android applications or in the file system, browse the elements of an schema, find usages of tables and columns, quickly open in-memory SQL editors, view and edit table data. Learn more.
- SQL Editor. This powerful editor provides a complete set of features that you need from an IDE: syntax highlighting, code completion, navigation to schema and alias definition, and much more. Learn more.
- Data Console. The data console can display query results, edit table data, and export its content to different formats, such as Excel! Learn more.
- Database Diagrams. Easily generate diagrams for databases, to aid visualization of tables, columns and relationships. Learn more.
Installing SQLScout
Starting with SQLScout 2.0.2, the downloaded archive contains the IDE plugin only. The Android server can be added to your project through Gradle.
You can download the SQLScout plugin from JetBrains’ Plugin Repository or from IDEScout's website.
To install SQLScout on Android Studio or IntelliJ IDEA, please follow these steps:
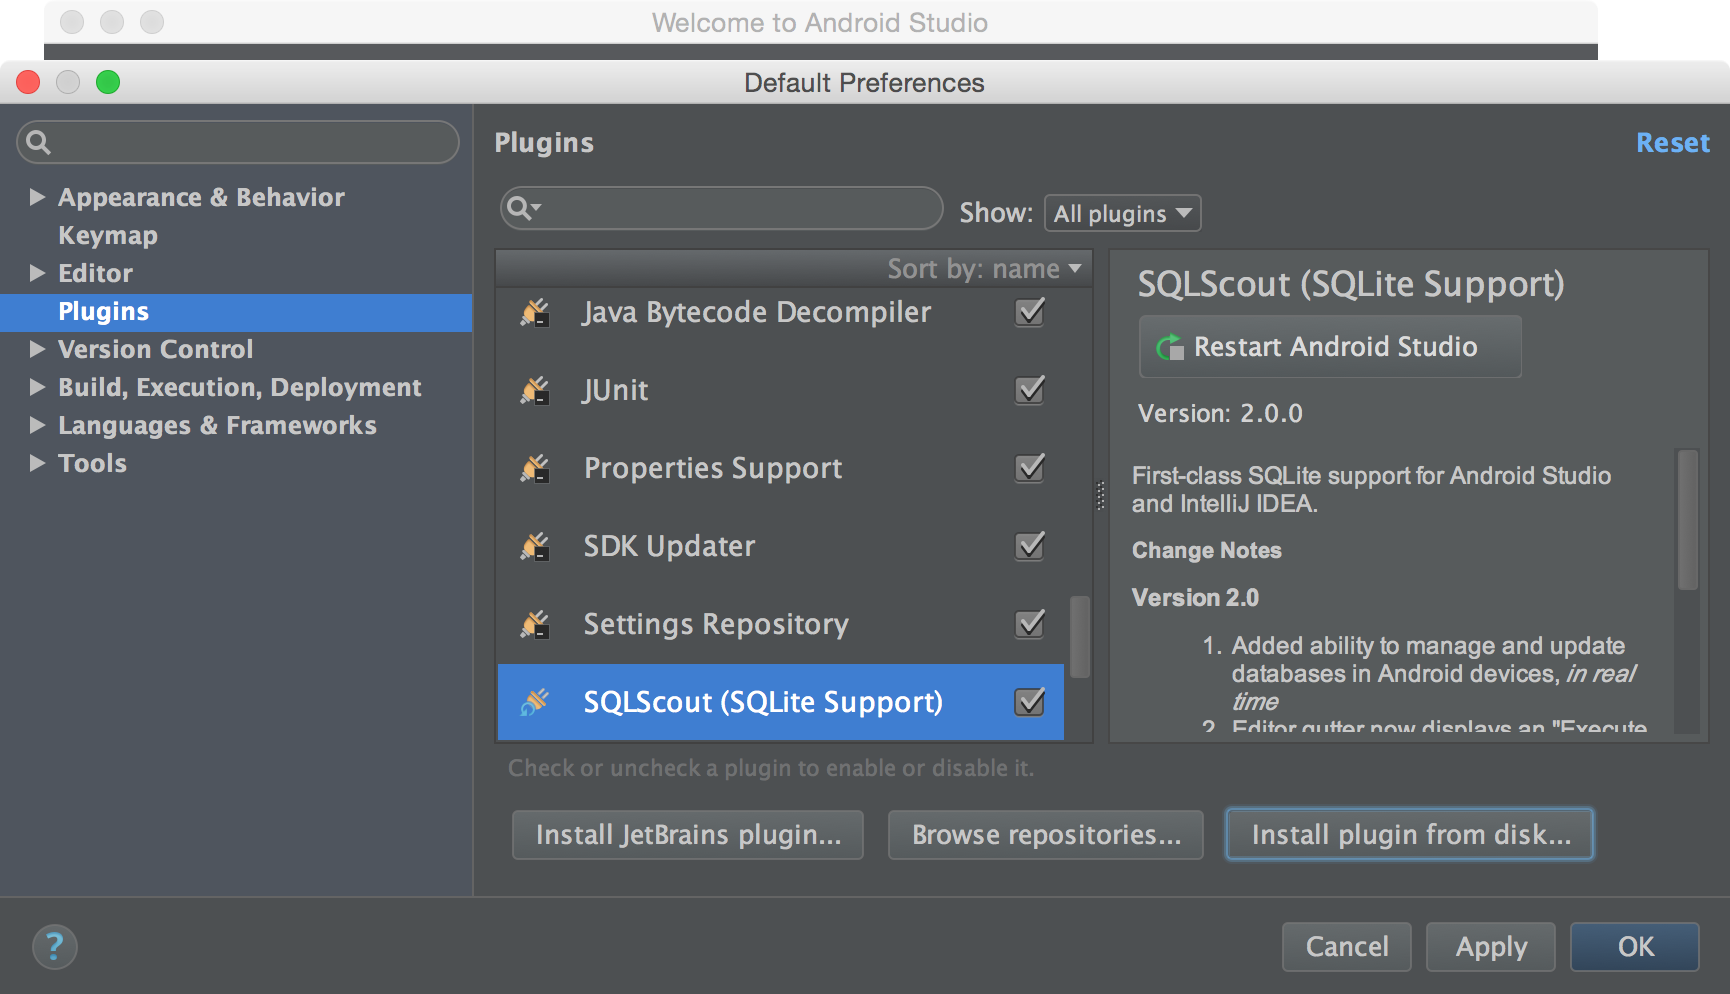
- Open the "Settings" (on Windows and Linux) or "Preferences" (on Mac) dialog.
- Select "Plugins" from the list on the left side.
To install from JetBrains' Plugin Repository:
- Click the "Browse repositories…" button
- Search for SQLScout
To install from the IDEScout download:
- Download the plugin from the “Available Versions” in IDEScout "Downloads" page
- Click the “Install plugin from disk…” button
- Select the downloaded .zip file from the file system
At the end, you will be prompted to restart the IDE.

Figure 2. Installing SQLScout
Activating SQLScout
After installing SQLScout, during and after the trial period, the IDE will prompt you to activate a commercial license of SQLScout. Click the link “Activate SQLScout”.

Figure 3. SQL Activation Notice
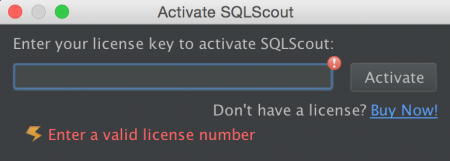
The dialog “Activate SQLScout” will be displayed. Please enter the license key you received (via email, after buying a commercial license) and press the “Activate” button.

Figure 4. "Activate SQLScout" Dialog
SQLScout will validate your license key. Once validation is complete, you will be able to use SQLScout.