SQLScout >
Data Console
SQLScout’s data console can display query results, edit table data, and export its content to different formats.
1. Overview
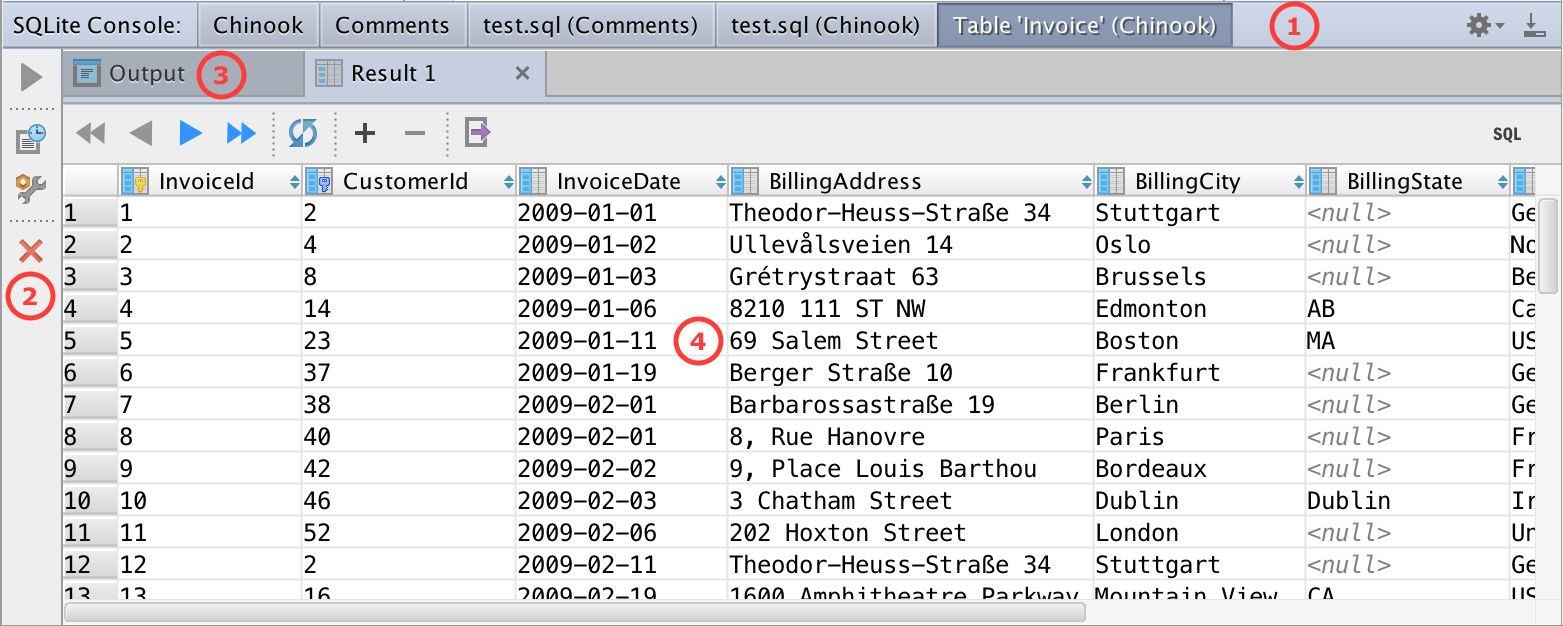
Figure 1. Data Console
- Console Tabs. Allows you to work with multiple consoles. SQLScout creates 1 console for each
- in-memory SQL editor (tabs Chinook and Comments in figure 1)
- Data Source in a file-based editor (tabs test.sql (Comments) and test.sql (Chinook))
- Table view, from the SQLite Explorer or database diagrams (tab Table 'Invoice' (Chinook))
- Main Toolbar. The main toolbar contains the following actions, which act on the currently selected console tab:
 Execute statement. Executes the SQL statement in the current console tab's Result tab.
 Browse Console History. Opens a dialog that displays all SQL statements executed in the current console tab.
 Settings. Opens the "SQLite" page in the IDE's Settings/Preferences dialog. In this page you can configure how many records to display per page, whether Results tabs should be reused and whether database error notifications should be displayed.
 Close. Closes the current console tab.
- Output View. This view shows the SQL statements that have been executed. There is one Output view per console tab.

Figure 2. Output View - Result Tab. The Result tab displays the result of executing a query (
SELECTstatement). If SQLScout is not configured to reuse Result tabs, there will be 1 Result tab per executed query (this setting can be changed by clicking the Settings action on the console's toolbar).
The toolbar in the Result tab has these actions (see figure 1):
 First Page, Previous Page, Next Page and Last Page. These actions are enabled if the number of records produced by the executed query exceeds the maximum number of records to display at a time (this setting can be changed by clicking the Settings action on the console's toolbar).
 'Reload Page. Reloads the query results by re-executing the SQL statement.
 Add New Row. Adds a new row to the table associated with the data console. This action is enabled only when viewing a table's data (not when executing SQL statements from the editor).
 Delete Selected Row. Deletes the selected row in the table view. This action is enabled only when viewing a table's data (not when executing SQL statements from the editor).
 Export data. Exports all the records to different formats (CSV, TSV, HTML table, Excel).
 View Query. Displays the executed
 SELECTstatement.
2. Viewing Large Result Sets
When the total number of returned records is greater than the maximum number of records to display at a time, SQLScout will display such records in multiple pages. To navigate across record pages, use the First Page, Previous Page, Next Page and Last Page actions ( ) on the toolbar.
The number of records to display at a time can be configured by clicking the Settings action on the console's toolbar.
3. Editing Table Data
With the data console, you can add, delete and update records without writing a single SQL statement. This functionality works only when viewing a table's data (by clicking the View Table Data action  , in the SQLite Explorer or database diagrams), not when executing SQL statements from the editor.
To add a new record, click the Add New Row action ( ) on the toolbar.
To delete the selected record in the table view, click the Delete Selected Row action ( ) on the toolbar.
To update individual column values in a record, double-click on a table cell or select a table cell and either press F2 or click the "Edit Value" context menu action. To set a value to NULL, select a table cell and click the "Set NULL" context menu action (see figure 3).

Figure 3. "Edit Value" and "Set NULL" Actions
SQLScout makes editing values easy by providing data type-specific editors.
Editing Numeric Values
SQLScout provides an in-place editor for numeric values. To apply value changes, press Enter. To cancel any updates and exit "edit mode", press Esc.
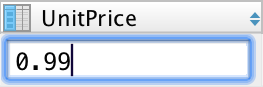
Figure 4. Editing Numeric Values
Editing Text
For editing text, SQLScout provides an in-place editor (for quick edits) and a more comprehensive dialog-based editor.
To apply value changes in the in-place editor, press Enter. To cancel any updates and exit "edit mode", press Esc.
The dialog-based editor provides these features (see figure 5):
- Enter multi-line text
- Set the value to NULL
- Upload a text file
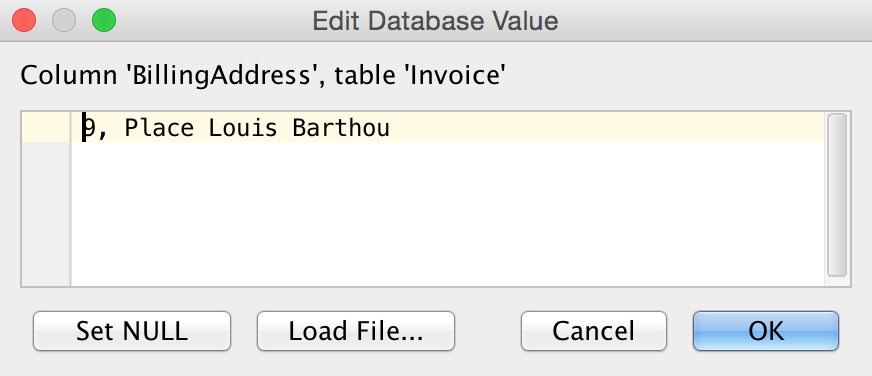
Figure 5. Dialog-based Text Editor
Editing Dates
SQLScout provides a date picker to make entering dates easy.
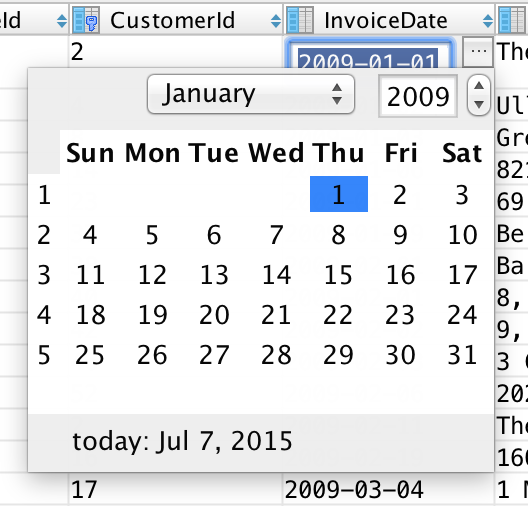
Figure 6. Date Picker
Editing BLOBs
To edit BLOBs, SQLScout gives you 3 options: upload file (the value will be treated as an array of bytes), set text value, or set NULL.
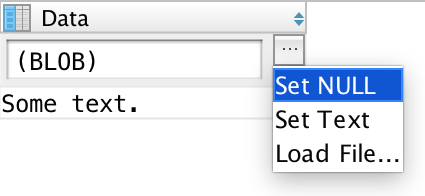
Figure 7. Editing BLOBs
If you select the "Set Text" option, SQLScout will display the same dialog-based text editor used to edit text values (see figure 5).
4. Sorting Table Data
You can sort the data displayed in the Result view by simply clicking any of the cells in the table header.
Sort Order
All column headers show an icon representing the sort order:
 Not sorted (default)
 Ascending order
 Descending order
Sort order changes every time you click the header of a column in the table. Clicking the header cell once will sort the column in ascending order. If you click the header cell again, the column will be sorted in descending order. Clicking the header cell one more time will cancel sorting.
Sort Level
Sort level is also displayed in the column headers. The first column to be sorted will have sort level 1. If you click the header cell of another column, that column will have sort level 2, and so on.

Figure 8. Sorted Columns
Figure 8 shows an example of sorted columns. Data is sorted by BillingAddress (ascending order and sort level 1) and BillingCity (descending order and sort level 2). The column InvoiceDate is not sorted.
5. Exporting Table Data
To export query results, click the Export data action in the Result toolbar ( ). SQLScout will display the Data Export dialog where you can choose the format to export to and whether the exported data should be copied to the clipboard or stored in a file (see figure 9).
The supported export data formats are:
- Comma-separated values (CSV)
- Tab-separated values (TSV)
- HTML table
- Excel
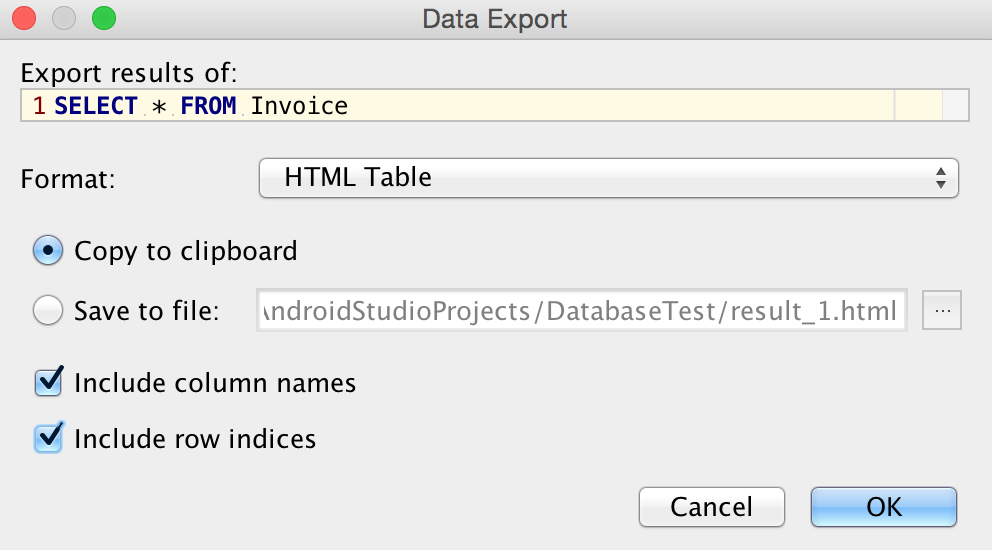
Figure 9. "Data Export" Dialog