SQLScout > SQLite Explorer >
Connecting to Android Databases
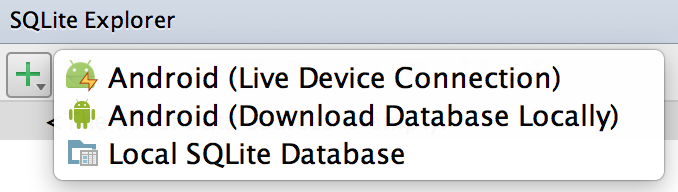
Figure 1. "Add Data Source" Actions
To connect to a database in an Android device (including the Android emulator), your project must be an Android application and it must be running on the emulator or a real device.
Live Device Connection
This is a new feature introduced in SQLScout 2.0 that allows you to connect, manage and update databases in your Android device, in real time.
One-time setup:
Note: SQLScout 4.3.0 (or newer) requires sqlscout-server 4.1 (or newer.)
- Add IDEScout's Maven repository to the top-level
build.gradlefile in your project:allprojects { repositories { jcenter() maven { url 'http://www.idescout.com/maven/repo/' } } } - Add SQLScout Server as a dependency to the debug and release build variants in your project's app module:
  debugImplementation 'com.idescout.sql:sqlscout-server:4.1'
  releaseImplementation 'com.idescout.sql:sqlscout-server-noop:4.1'
Note:com.idescout.sql:sqlscout-server-noop' is a no-op artifact meant to be used in release builds. - In the
onCreatemethod of your mainActivityinvoke the methodcom.idescout.sql.SqlScoutServer#createas follows:@Override public void onCreate(Bundle savedInstanceState) { SqlScoutServer.create(this, getPackageName()); - (Optional) Use
SQLScoutServer's lifecycle methods to pause/resume debugging and dispose the server:private SqlScoutServer sqlScoutServer; @Override public void onCreate(Bundle savedInstanceState) { sqlScoutServer = SqlScoutServer.create(this, getPackageName()); @Override protected void onResume() { sqlScoutServer.resume(); } @Override protected void onPause() { sqlScoutServer.pause(); } @Override protected void onDestroy() { sqlScoutServer.destroy(); }
To create a "live device connection":
- Click the "Add" action in the SQLite Explorer and select "Android (Live Device Connection)" (see figure 1). The "New Android SQLite Data Source" dialog will appear (see figure 2).
- Enter the name of the Data Source. Please note that this is a logical name for the database connection and not the name of the database itself.
- Select the device from the "Device" drop-down. An empty drop-down means that there are not any running Android devices connected to the IDE.
- Select the package name (or application ID) from the "Package name" drop-down. The drop-down only includes packages (or application IDs) that contain a database.
- Select the type of storage: internal or external memory of the device or emulator.
- Select the SQLite database from the "Database" drop-down.
- Click "OK".
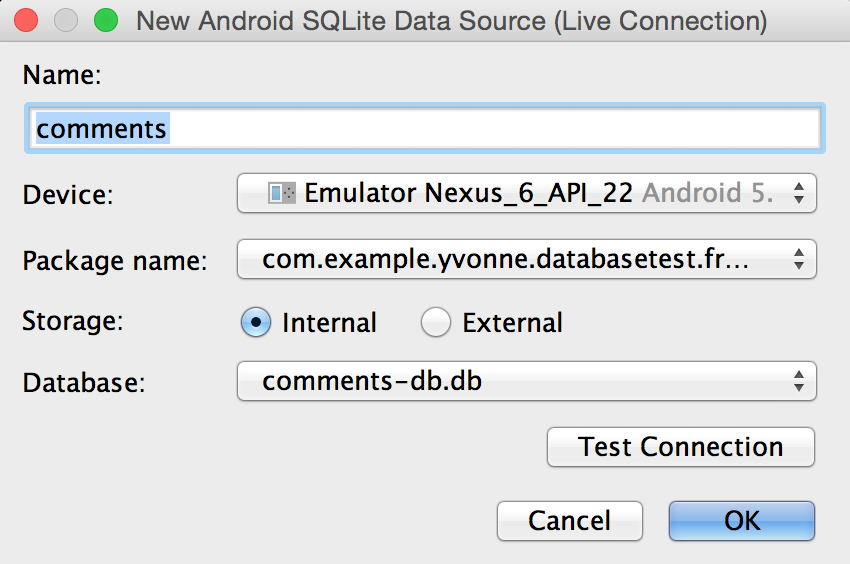
Figure 2. "New Android SQLite Data Source" dialog
Download Database to Disk (for offline usage)
This option allows you to download a database from an Android device. The database will be copied to your local hard disk and can be used even if your Android application is not running.